Are you concerned about your bone health and wondering if REMS is right for you? Here's what you need to know:

Bone Strength vs BMD

Bringing bone health to the patient
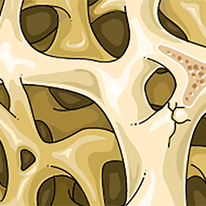
If you ignore your bones, they will go away!

REMS - Radiofrequency Echographic Multi Spectrometry - an ultrasound-based method of assessing bone density and bone structure utilizing pulsed echographic sonography. DXA - Dual Energy X-ray Absorptiometry - commonly used method of determining bone density using two x-ray beams of relatively low and differing energy levels to assess the capacity of the bone to attenuate the beams. Bone densitometry – the process of measuring the bone density (BMD) utilizing any of the World Health Organization (WHO) standardized methods which include DXA and REMS. BMD - Bone Mineral Density - A measurement of bone mass in an individual. It is determined by measuring the bone mineral content (BMC) which is then distributed over the measure of bone area. BMD is written as g/cm2. BMD is what is being determined during a bone densitometry examination. Therefore, BMD is considered an “areal” measurement (derived from “area” since it comes from a flat surface area measurement and not a volumetric measurement). Second, BMD is used to then determine the measurements known as the T-score and the Z-score. Bone Quality – is a non-technical term for bone structure. Bone Structure – all of the physical properties of bone including but not limited to: microarchitecture, micro-fracturing, collagen composition, collagen maturity, collagen crosslinking density, crystal structure, crystal composition, specific gravity, elasticity, malleability, chemical composition, porosity, and conductivity. Bone structure determines bone strength (stiffness) which is the ability of a bone to withstand an applied force and not fracture. The strength (stiffness) of a bone is what determines if a bone fractures. Bone Strength (Stiffness) – The ability of a bone to withstand applied forces and not fail (fracture). Bone strength is a mechanical property of bone that is determined by the multiple physical properties of bone. FS - Fragility Score - a measure of bone structure. It is a number that is determined along with the BMD during a REMS study. During a REMS assessment the target bone is sliced up like a loaf of bread and the echo coming from each slice of bone is statistically compared to the soundwaves from a person who has not fractured (non-fragile) and then to someone who has sustained a fragility fracture (fragile). The FS represents the statistical average of the slices of bone that better match someone with fragile bone. The FS is then applied to the fracture risk assessment graph on the REMS report to determine fracture risk. Currently, the FS has the highest level of sensitivity and specificity for fracture risk prediction when compared to DXA-derived or REMS-derived BMD values. It appears to have the best predictive value for fracture risk. Fracture Risk Assessment Graph - The FRA graph plots FS against age and currently represents a robust database of 10,000+ individuals. The colors differentiate those individuals who have sustained a fragility fracture from those who have not; the red zone represents individuals who have fractured, and the green zone represents individuals who have not fractured. The red and green zones are absolute. Everyone has fractured in the red zone, and no one has fractured in the green zone. The yellow zone represents red and green overlap – there is a mix of red and green underneath the yellow. Therefore, the yellow zone represents an area of statistical uncertainty in fracture risk assessment. Fracture risk is considered to be low in the yellow zone near the green but high in the yellow zone near the red. Therefore, fracture risk increases as the yellow zone is traversed from green to red. LSC - Least Significant Change - is the error margin of a particular densitometry unit. An appropriately calibrated DXA machine has an LSC of 3% to 5% - it has an error rate up to 5% for any study done. Any changes in a sequential series of DXA-derived BMD values that are less than 5% cannot be considered statistically significant and therefore cannot be used for treatment assessment and/or treatment recommendations. In other words, you would have to have a greater than 5% bone loss between two serial DXA studies in order for that change to be meaningful. The LSC is main reason that DXA scans are indicated every two years - it is statistically more likely that you will lose 5% of your bone mass over two years vs one year. REMS has an LSC of 0.5% to 1.05% and therefore REMS studies, if medically indicated to monitor the effectiveness of an osteoporosis medication, can be done yearly or even every 6 months. Normal Density - is the state of bone with good density that was determined by bone densitometry and defined by a T-score of 0 (zero) SD to (–) 1.0 SD. Osteopenia - is the state low bone density that was determined by bone densitometry and defined as a T-score of (–) 1.1 SD to (–) 2.4 SD. Osteoporosis - is the state of very low bone density that was determined by bone densitometry and defined as a T-score of ≤ (–) 2.5 SD (standard deviation). QUS - Quantitative Ultrasound, the precursor to REMS. QUS utilizes transmission ultrasound and was routinely done at the heel. ROI - Region of Interest are the areas of the body that has been determined by the WHO that are scanned during bone densitometry to determine a clinically significant BMD measurement. Both REMS and DXA have the same axial ROIs - vertebral bodies L1 through L4 in the lumbar spine and both hips that include the femoral neck and total hip. DXA has an additional ROI - the distal 1/3 of the non-dominant forearm which can be useful in certain clinical cases. T-score - is a statistically derived number that also serves two purposes. First, it gives a numerical representation of the comparison of an individual's BMD measurement to that of a reference BMD (the mean BMD value of a large database of 30-year-old Caucasian females is the benchmark for all comparisons). To determine how we compare to that database, we use the concept of standard deviations which represents a certain percent value away from the established average value as determined on a bell curve (at a certain age if we have lost a certain amount of bone as compared to a 30-year-old then we can say that we are a “negative one standard deviation away” or we have a T-score of -1.0; if our BMD matches the mean BMD then the T-score would be 0). The T-score is also used to determine a diagnosis. The WHO has set parameters that a T-score value of 0 to -1.0 would be considered normal bone density, that a T-score value that ranged from -1.1 through -2.4 would constitute “low bone density (or osteopenia) and that a T-score of -2.5 or lower (larger negative number) establishes the diagnosis of osteoporosis. Z-score - is conceptually similar to a T-score except it is the method of comparing BMD value to the mean BMD of a 5-year bracketed age and gender specific cohort database (5-year interval). A Z-score would be zero (0) if it falls exactly on the mean (average) BMD value of individuals in the age and gender specific cohort and will be measured in SDs along a bell-curve. The Z-score has no clinical relevance between the ages of 40 and 90 years old. Outside of the 40–90-year-old age bracket, the Z-score establishes a diagnosis – the benchmark for osteoporosis is a Z-score of -2.0 SDs or lower. Concordance - T-score values that are within a value of one Standard Deviation (SD). In general, the T-score values obtained during a densitometry examination should always be concordant if the test was appropriately performed. If the T-score values are not concordant (discordant) then more likely than not there was a technical issue affecting the test or there is an issue with the bone being assessed. Either situation would require further investigation. Discordance - T-scores values that are greater than 1 SD apart indicating either a test with questionable validity or an issue with the bone being assessed. TBS - Trabecular Bone Score - a method of determining a measure of bone quality of using otherwise unprocessed data obtained during a spinal DXA scan to evaluate bone quality. It is a significant addition to a DXA scan and it obviously has clinical relevance in helping Bone Healthcare providers make better treatment recommendations. Not all DXA units are TBS capable – it is a software add-on. Also, the quality of the TBS is dependent on the quality of the index spine DXA scan. VFA - Vertebral Fracture Analysis - a spine assessment to evaluate for or to monitor spinal compression fractures. A VFA is performed on a DXA unit (if the DXA has the appropriate software) and it will show the entire spine on a single image. VFA (or lateral x-rays of the thoracic and lumbar spines) are indicated for screening once a woman reaches 70 years old and a man 80 years old. Also, it is indicated for sudden onset of backpain following a traumatic event, severe back pain and/or as a yearly screening tool for someone with a history of compression fractures or any kind of fragility fracture.

Rates of osteoporosis and fractures associated with weak bone, known as fragility fractures, are at epidemic levels. It is estimated that osteoporosis affects approximately 200 million people world-wide. Currently, it is also estimated that 10 million individuals over age 50 in the United States have osteoporosis. Each year approximately 2 million individuals suffer a fracture due to osteoporosis. The risk of a fracture increases with age and is greatest in women. Approximately 1 in 2 women and 1 in 5 men age 50 or older will experience a hip, spine, or wrist fracture sometime during their lives. Approximately 40% of individuals are unable to return to their homes following a fragility fracture and require relocation to a nursing facility. As many as 20% of individuals will die within 6 - 12 months of a fragility fracture. Also, an additional 33.6 million individuals over age 50 have low bone density or “osteopenia” and thus are at risk of osteoporosis and fragility fracture. Public health care cost associated with fragility fractures is predicted to be well over $20 billion. To stem the exponential rise in osteoporosis and fragility fractures and the associated human suffering and financial burden on society, it is important that our healthcare policy makers develop and implement public-wide screening and testing programs, and education programs to increase awareness of the public on the importance of bone health. Also, our leadership needs to show that it is serious in this endeavor by allocating sufficient resources to the front-line healthcare providers to appropriately address this crisis in their patient base. However, there are things that can be done on an individual basis to maximize bone health and to minimize the risk of fracture. Bone health is not different from heart health or gut health – all of our body systems work together in unison and often when that synergy gets interrupted and things get out-of-synch that we get sick. The basics of good health are pretty consistent – nutritious and balanced diet, active lifestyle, minimizing stress, appropriate exercise and plenty of rest. Also avoiding unhealthy lifestyle habits such as smoking and excessive alcohol consumption and eating low-nutrition and overly processed foods. These recommendations are universal for maintaining good health. A very important factor in both forming and maintaining healthy bone are healthy and strong muscles. And healthy and strong muscles are the result of an active lifestyle and resistive exercises. Bone development and remodeling is driven by the applied forces that the bone “feels”. Force applied to the bone, primarily from the exertion of muscle contractile forces, stimulates the bone cells called osteocytes. Osteocytes reside in the bone matrix and “sense” the applied force to bone through electrical signals. The osteocytes in turn send out signals to the cells that remodel bone – the osteoclasts and osteoblasts. The osteoclasts begin the process of bone remodeling and building by latching onto the bone to break down the old and damaged bone matrix. They then recruit the osteoblasts to fill in new healthy bone. This process is referred to as being “coupled” and is the only way that physiologic (structurally strong) bone is built and maintained. Proper nutrition is extremely important for healthy bones throughout life but in particular during the years that bone is forming. Early implementation of health nutritional habits twill help maximize the muscle and bone-building process and will optimize the amount of muscle and bone that we have throughout our lives. Monitoring of the bone health is the foundation of fracture prevention in the way monitoring blood pressure is to stroke prevention and mammograms are to breast cancer prevention. The early detection of any of these conditions, allows for early treatment to be institutes to prevent the long-term consequences of the disease. Although, some may still consider developing weak bones to be an unfortunate part of growing older, it is now understood that fracturing due to idiopathic age-related bone loss is not an inevitable part of aging but a potentially preventable disease process. Proper nutrition and exercise maintain strong muscles and bone – monitoring makes sure that they are working. The traditional term for bone assessment is bone densitometry – the measurement of bone mineral density (BMD). Determining BMD by using Dual Energy X-ray Absorptiometry (DXA) has been the traditional method of diagnosing osteoporosis and predicting fracture risk for over 30 years. However, it is now recognized that this method of bone assessment is flawed and often unreliable in accurately determining fracture risk. REMS (Radiofrequency Echographic Multi Spectrometry) is a newer method of monitoring bone health that was developed and has been used in Europe for almost ten years. REMS has replaced DXA as the official method of bone assessment in Italy. REMS uses ultrasound to measure BMD. However, ultrasound is also capable of determining bone structure. Therefore, when REMS is used to assess bone, information about the bone’s structure is obtained providing a better way to predict fracture risk. REMS is still new in the United States, but the demand for REMS is growing as more people are learning about it. In addition to nutrition and exercise, to maintain a healthy skeleton, there are other important factors. Maintaining good health and managing chronic conditions are important to maintaining a healthy musculoskeletal system. Hormone balance will also affect our musculoskeletal and the appropriate use of hormone replacement (BHRT) helps maintain a healthy musculoskeletal system . The decision to begin BHRT should be made in consultation with your healthcare provider. In conclusion, it is important to remember that your bones need to be monitored and cared for like any other part of you and although we focused on bone health as a women’s health issue, poor bone health can affect anyone. Everyone has a skeleton and we need to pay attention to and take care of our skeletons because………... if you ignore your bones, they will go away!

What is REMS?

Here are some bullet point comparisons of the two technologies as a quick reference

The answer is ……a definite maybe! Obviously, all provider-patient relationships are different and depend not only on the provider and the patient, but the type of relationship you can have with your provider often depends on the setting where the healthcare is being delivered. In the body of this post we hope to provide insight into what we as providers consider when we review information that a patient has brought to us. We want to offer some suggestions on how to encourage and increase the likelihood that your provider will read what you have provided to them. Know thy provider!!!!! - Everyone is different and you probably will already know whether or not your provider is amenable to receiving information from patients. If it is not your provider’s style to be receptive - don’t push the issue because it will not work and it may just set up feelings of frustration and possibly even unnecessary animosity which is counter-productive to any provider-patient relationship. Let it go and look for other options! Respect your provider’s time!!!! - Even if your provider is willing to look at information that you bring in to help you determine if it is reasonable and even possibly beneficial for you it will take up time. Time is a problem in our modern health care system - modern medicine has had to become a “lean and mean fighting machine.” As insurance reimbursement levels continue to fall in order to stay open medical practices have to be “efficient”. Your provider has mandatory objectives that need to be completed during your visit in order to “close the loop” that include identifying your medical issue, addressing it and providing treatment all within in either 10, 15 or 20 minutes, whatever time your provider’s business overlords have allotted (very few providers are in their own practices). After they have completed your visit, they have 20-30 more visits to complete! You may have to book additional time (the question is whether insurance will pay for that time) to discuss an educational issue in any significant detail. Understand that your provider may be skeptical of internet-based information that you bring in order to help keep you safe!!!!! - The internet is fantastic in many ways and there is a wealth of knowledge just a click away! However, there are also scams, misinformation and deceptive practices flourishing, often dressed up to look legitimate and wholesome. When your provider reviews something that you bring in, there should be a level of caution on their part. However, providing patients with education is a big part of the healing process so your provider should be willing to critically evaluate what you have brought them and realize that you are bringing to their attention because it is important to you. You may want to even point out how important it is to you for them to evaluate what you have brought to them and that you really respect their opinion - otherwise you wouldn’t be putting your health into their hands! Understand what “standards of care” means and implies!!! - How a provider practices is based on her/his knowledge-base which is a composite of education/school, training and experience. However, “standards of care” are the region specific medical care standards practiced by surrounding providers in similar practice situations. Obviously, the “standards of care” will be different between a University Medical Center and a small community hospital. However, both “standards” should still deliver an acceptable level of health care. In order to maintain practice with an accepted “standard of care” a provider may stay with acceptable methods of providing care and not venture out of that “standard of care” comfort zone. Cutting edge is often what brings about innovation in health care but it is possibly a risky proposition - that goes back to the premise that it is your provider's responsibility to keep you safe. In regards to our topic - DXA is considered “standard of care”; REMS has not yet achieved that designation (but we are working on it!) Show your provider that you respect their advice and recommendations, but if you disagree, tell them why you don’t agree and what alternative plan you would prefer that they consider. Be sure to be able to explain your opinion and having a valid reference at hand will go a long way!!!! Understand that your provider wants to keep you safe, but they also want to provide the highest level of healthcare that they can - in 10 minutes. Ultimately, your health care is your decision! Ask your physician to partner with you and offer their guidance. This is not an unreasonable request to make to your provider. For example, every so often there will be a patient in my ortho practice who declines a cast. If splinting is a reasonable alternative, then I will explain to the patient why I think that casting is a better treatment choice; discuss explicit instructions for splint use and document the patient’s preference in the medical record, as well as their statement of understanding of risks and declination of my recommendations, and then apply the splint and continue to monitor their progress. In most cases, it’s not a big deal - but sometimes it may be so it has to be case-by-case! With REMS, since many providers know nothing about it, you will have to be knowledgeable. Make sure that you understand the results of your report and the specific information that REMS provides that DXA does not (i.e., Fragility Score). To assist you in this challenge, use the references from the prior post. If your provider is willing to review some of the references that may be the first step in the process of breaking through their first line of defenses and possibly raising their curiosity. You can only hope!

My journey into bone health was not something that I can claim that I planned on doing. It was more a reaction to the changing medical landscape during the COVID pandemic. So let me start off with something easier - how I decided to go into medicine. My path into healthcare was pretty straight-forward. I went to medical school straight out of college planning to be a family doc. However, after doing an orthopedic surgery elective in my third year of med school and seeing that the ortho operating room looked a lot like the workshop in my garage, I was smitten. I was lucky enough to get into an orthopedic residency program and embarked on my 30 year career as an orthopedic surgeon. To say that those 30 years were like a roller-coaster ride is an understatement! Coming out of residency I had planned on practicing as a general orthopedic surgeon in a community-based practice. I believed that I would not only practice in the community but that my family and I would live in that community and be part of it, and that I would stay my entire career in that community just like many of the surgeons that I trained with and that I wanted to emulate. However, my career turned out very different. It was after I weathered a practice closure, several consulting jobs and a stint as a surgeon in the prison system and as a locum tenens, that I finally had the opportunity to start my own practice in a small town in rural North Carolina. Things went well early on and my practice grew by referral and by word-of-mouth. It seemed that all would be well. However, things began to change. The rising costs of healthcare became a hot political topic and dramatic changes to Medicine were instituted. Multiple unfunded mandates (expensive things that the government makes you do but doesn’t reimburse you for) hit medical practices. EHR, digital x-ray and data collecting and reporting started significantly increasing the cost to practice medicine. Also insurance companies began to put up incredible hurdles for docs to be able to properly care for patients requiring incredible amounts of paperwork for “pre-authorizations”. At the same time they started to significantly decrease payments for medical services including surgeries all in the name of cost savings. As many of you may have noticed, insurance premiums did not go down even as reimbursements for providers were dramatically cut - please refer to your EOBs - and denials for services became common-place and perversely, insurance company profits and insurance company executive compensation skyrocketed to obscene levels - and premiums continue to rise! These dramatic changes put a tremendous amount of financial pressure on many independent medical practices. Being faced with this financial pressure a lot of practices threw in the towel and were either taken over by larger hospital systems and groups (Medical monopolies? What could possibly go wrong?) or just disappeared. My situation as a solo-practitioner in private practice was not very different but, being incredibly stubborn, I was determined to stay independent. However, to do so required that I fundamentally change my orthopedic practice. Surgery would remain the main-stay of my practice, but other sources of revenue would be important. And then COVID hit! This is when I began to investigate some other options, one of which was providing “Bone Health Care” services. It wouldn’t be unreasonable to assume that bone health care should be part of the realm of orthopedics. However, in reality, orthopedic surgeons are taught to fix fractures, not keep them from occurring - prevention was never a Grand Rounds topic. However, there are a handful of Orthopedic Surgeons who committed at least a part of their careers to bone health care and fracture prevention. It was after I read several articles, in particular articles written by the late Dr. Andy Bunta who was a Professor of Orthopedic Surgery at Northwestern University that the idea of bone health care began to coalesce in my mind. Dr. Bunta urged us, his orthopedic surgeon colleagues, to take leadership roles in bone health care, not only through fracture fixation but with fracture prevention. I realized that much of what Dr. Bunta and others were promoting was correct - bone health care was not really considered a serious health care issue and no one was taking ownership of it in the community. After consulting with my medical colleagues in town who at first seemed surprised by what I wanted to do but soon were very supportive of my decision to provide bone health care, I started my personal “bone health retraining” program. Being an obsessive-compulsive surgeon I started my program with a structured and rigorous approach - hours reading and studying and listening to lectures, webinars and CMEs that resulted in my practice obtaining FLS (Fracture Liaison Service) designation and Bone FIt certification. Membership in the AOA Own-the-Bone registry and completion of the ISCD densitometry training course then gave me a foundation to get my bone health program going. But, the one thing that jump-started the development of my program happened through serendipity. As I was clearing out my email folder one morning, right before I was about to download a whole bunch of emails into the trash, one email caught my eye. It was about some kind of ultrasound machine called Echolight REMS that could help predict if patients might be susceptible to periprosthetic fractures (nasty types of fractures above or below joint replacements). Instead of throwing it in the trash I read that email and I was hooked. After a couple of email exchanges, telephone calls, and Zoom meetings, the Echolight team was in my office installing an EchoS unit to trial. The Echolight team also recommended that I call an orthopedic surgeon up in NJ who had started using Echolight REMS just several months earlier. I called that surgeon - Dr. Kimberly Zambito, and as they say, the rest was history. With the Echolight REMS and a lot of good advice from Dr. Zambito, my bone healthcare program took off and the Bone Matrix and the Echolight REMS discussion group became a reality. Although the Echolight REMS group still remains a small group of doctors, we are committed to providing quality Bone Healthcare and understand the impact that a fracture can have on someone's life. Dr. Zambito and I have both fixed thousands of fragility fractures and have seen those effects first-hand. But the other aspect with which I agree with Dr. Zambito is that it is very evident is the fact that there are a lot of folks who are scared - not only scared of fracturing but also scared because of the uncertainty that often goes along with getting the diagnosis of osteoporosis and not knowing or understanding what that really means. In a short time, due to other factors beyond my control, the side-hustle became my primary direction Often the diagnosis of osteoporosis follows a DXA test. To give credit where credit is due, DXA had basically created the current field of Bone Health Medicine by providing a method of quantitatively measuring bone density. But DXA is an imperfect test that is prone to errors, especially when it needs to be done in a manner that allows it to be “efficient”. Due to the same poor healthcare policy decisions and insurance company greed that have affected all physicians, docs who own DXA machines are often forced to sacrifice quality for efficiency and many times the DXA scans are poorly done. Unfortunately, it is the individual who is getting the test that is the casualty of that situation, having to make significant healthcare decisions based on a test whose results may be flawed. In our bone health programs, we feel that with REMS technology, that yields both a BMD and a fragility score (measure of bone quality) we can provide an accurate, reproducible and reliable method of determining bone densitometry and quality and therefore help give our patients the reassurance that the decisions that they are making are based on correct data.